


Understanding Push and Pull Compensation
Ever stitched a design that looked perfect on screen… but came out slightly distorted on fabric?
- What Is Push and Pull Compensation?
- Why Push and Pull Happens
- How Push and Pull Affects Your Design
- Push vs Pull (Simple Breakdown)
- How to Apply Push and Pull Compensation
- 1. Expand Narrow Elements
- 2. Adjust Shapes
- 3. Add Pull Compensation to Satin Stitches
- 4. Use Proper Underlay
- 5. Test and Refine
- Factors That Affect Compensation
- Common Mistakes to Avoid
- Pro Tips from Absolute Digitizing
- Real-Life Example (Simple Analogy)
- Conclusion
- FAQs
Letters look wider. Circles turn oval. Edges don’t line up.
That’s not your machine’s fault—it’s fabric behavior.
Understanding push and pull compensation is the key to fixing this problem and getting clean, accurate embroidery every time.
Let’s break it down in a simple way.
What Is Push and Pull Compensation?
When a machine stitches, the fabric moves.
- Push = stitches push fabric outward
- Pull = stitches pull fabric inward
This movement causes shapes to change during embroidery.
Push and pull compensation means adjusting your design before stitching so it looks correct after stitching.
Think of it like predicting shrinkage before washing clothes.
Why Push and Pull Happens
Fabric is not rigid like paper. It stretches, shifts, and reacts to stitches.
Here’s why distortion happens:
- Thread tension pulls stitches tight
- Needle penetration shifts fabric fibers
- Stitch direction adds pressure
- Fabric type changes behavior
So even a perfect design file can stitch out imperfectly without compensation.
How Push and Pull Affects Your Design
If you ignore push and pull compensation, you may see:
- Text becoming too thick
- Gaps between elements
- Misaligned outlines
- Distorted shapes (circles, curves)
This is especially noticeable in small text and detailed designs.
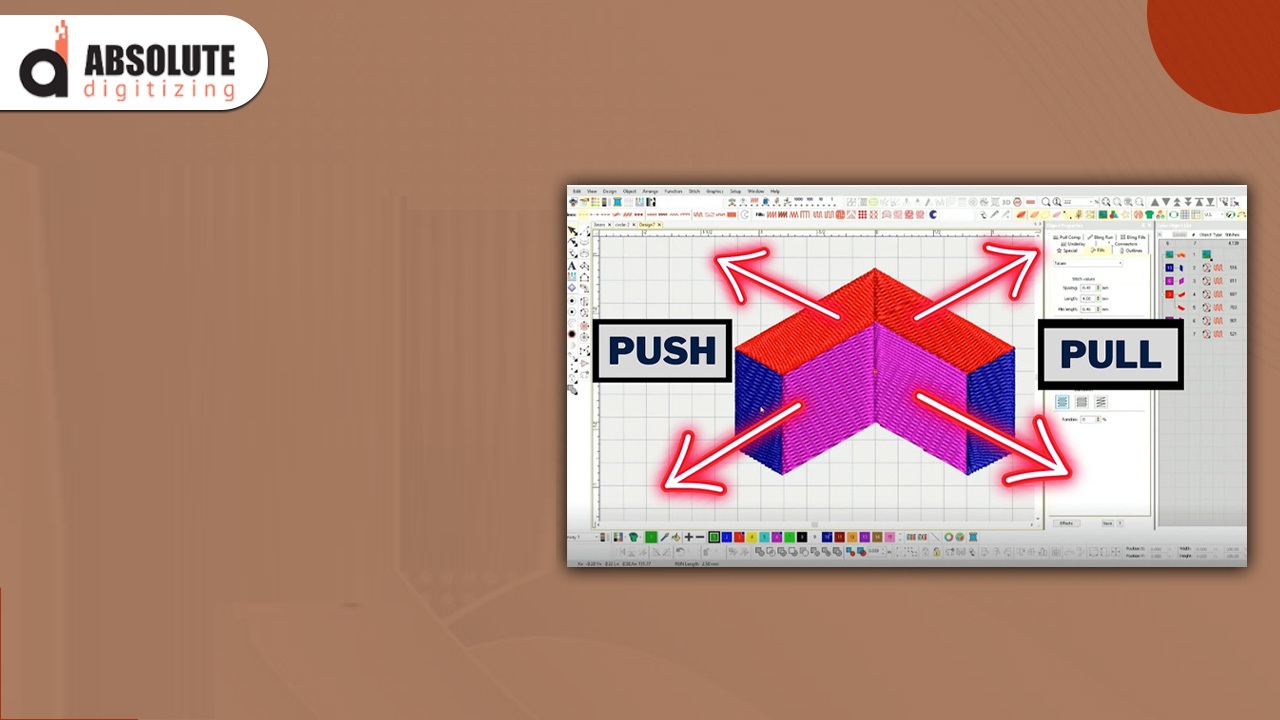
Push vs Pull (Simple Breakdown)
Push Effect
- Happens perpendicular to stitch direction
- Expands the design outward
- Common in fill stitches
Pull Effect
- Happens along the stitch direction
- Shrinks the design inward
- Common in satin stitches
Understanding both helps you control your final result.
How to Apply Push and Pull Compensation
Here’s a simple step-by-step approach:
1. Expand Narrow Elements
Thin columns (like text or borders) tend to shrink.
- Slightly widen them in your design
- This helps them look correct after stitching
2. Adjust Shapes
Some shapes need manual correction:
- Circles → slightly widen horizontally
- Squares → adjust edges to balance distortion
These small tweaks make a big difference.
3. Add Pull Compensation to Satin Stitches
For satin columns:
- Increase width slightly
- Prevents them from becoming too thin
4. Use Proper Underlay
Underlay stabilizes fabric and reduces movement.
- Edge run underlay improves edge accuracy
- Zigzag underlay supports wider columns
Better stability = less distortion.
5. Test and Refine
There’s no perfect setting for every design.
- Run a test stitch
- Observe distortion
- Adjust compensation gradually
Trial and error is part of the process.
Factors That Affect Compensation
Push and pull compensation is not the same for every job.
Fabric Type
- Stretchy fabric → more compensation needed
- Stable fabric → less adjustment
Stitch Type
- Satin stitches → more pull
- Fill stitches → more push
Design Size
- Small designs → more noticeable distortion
- Large designs → easier to balance
Stabilizer Used
- Strong stabilizer reduces fabric movement
- Weak stabilizer increases distortion
Common Mistakes to Avoid
When learning understanding push and pull compensation, avoid these:
- Ignoring fabric type
- Overcompensating (makes design look odd)
- Skipping test runs
- Using the same settings for all designs
- Not adjusting small text
Balance is everything.
Pro Tips from Absolute Digitizing
At Absolute Digitizing, we treat compensation as a must—not an option.
Here are some expert tips:
- Start with small adjustments (don’t overdo it)
- Focus more on small details and text
- Combine underlay with compensation for best results
- Keep notes of what works on different fabrics
- Always test before final production
Great embroidery is all about control and precision.
Real-Life Example (Simple Analogy)
Imagine drawing on a rubber sheet.
When you stretch it, your drawing changes shape.
To fix that, you’d draw it slightly distorted so it looks correct when stretched.
That’s exactly how push and pull compensation works in embroidery.
Conclusion
Understanding push and pull compensation is one of the most important skills in embroidery digitizing.
It helps you:
- Maintain design accuracy
- Improve stitch quality
- Avoid costly mistakes
Once you start applying it properly, your designs will look cleaner, sharper, and more professional.
Practice, test, and refine—that’s the secret.
FAQs
1. What is push and pull compensation in embroidery?
It’s the process of adjusting a design to counter fabric movement during stitching.
2. Why does my embroidery design look distorted?
Distortion happens بسبب fabric movement, stitch direction, and lack of proper compensation.
3. How much pull compensation should I use?
It depends on the design and fabric, but small adjustments (0.1–0.3 mm) are a good starting point.
4. Does fabric type affect push and pull?
Yes, stretchy fabrics need more compensation, while stable fabrics need less.
5. Can beginners apply push and pull compensation?
Yes, with practice and testing, beginners can learn and apply it effectively.


